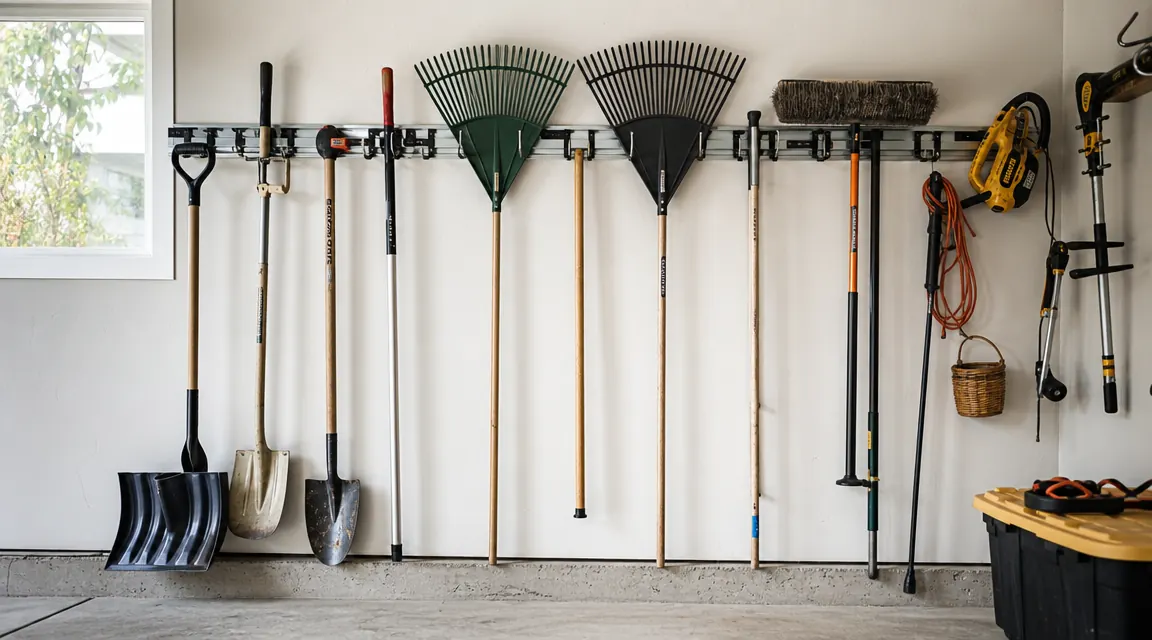
My garage wall used to be the place tools went to fall over. I had a rake leaning on a shovel leaning on a push broom, and every time I moved one, something else crashed onto the hood of my car. I kept telling myself I would deal with it later. Later turned into two years and one cracked rake handle. If any of that sounds familiar, this guide is for you.
Wall-mount tool racks fix this problem in a single afternoon, but only if you mount them into studs. A bar floating on drywall anchors alone will fail the moment you hang anything heavier than a feather duster. This guide walks you through every step: finding studs, marking the wall, drilling, mounting the StoreYourBoard 72-inch garage tool organizer, spacing the 15 hooks, and loading tools so the heaviest ones do not pull the bar out of true. By the time you are done, the garage floor will be clear and every tool will have a spot it actually goes back to.
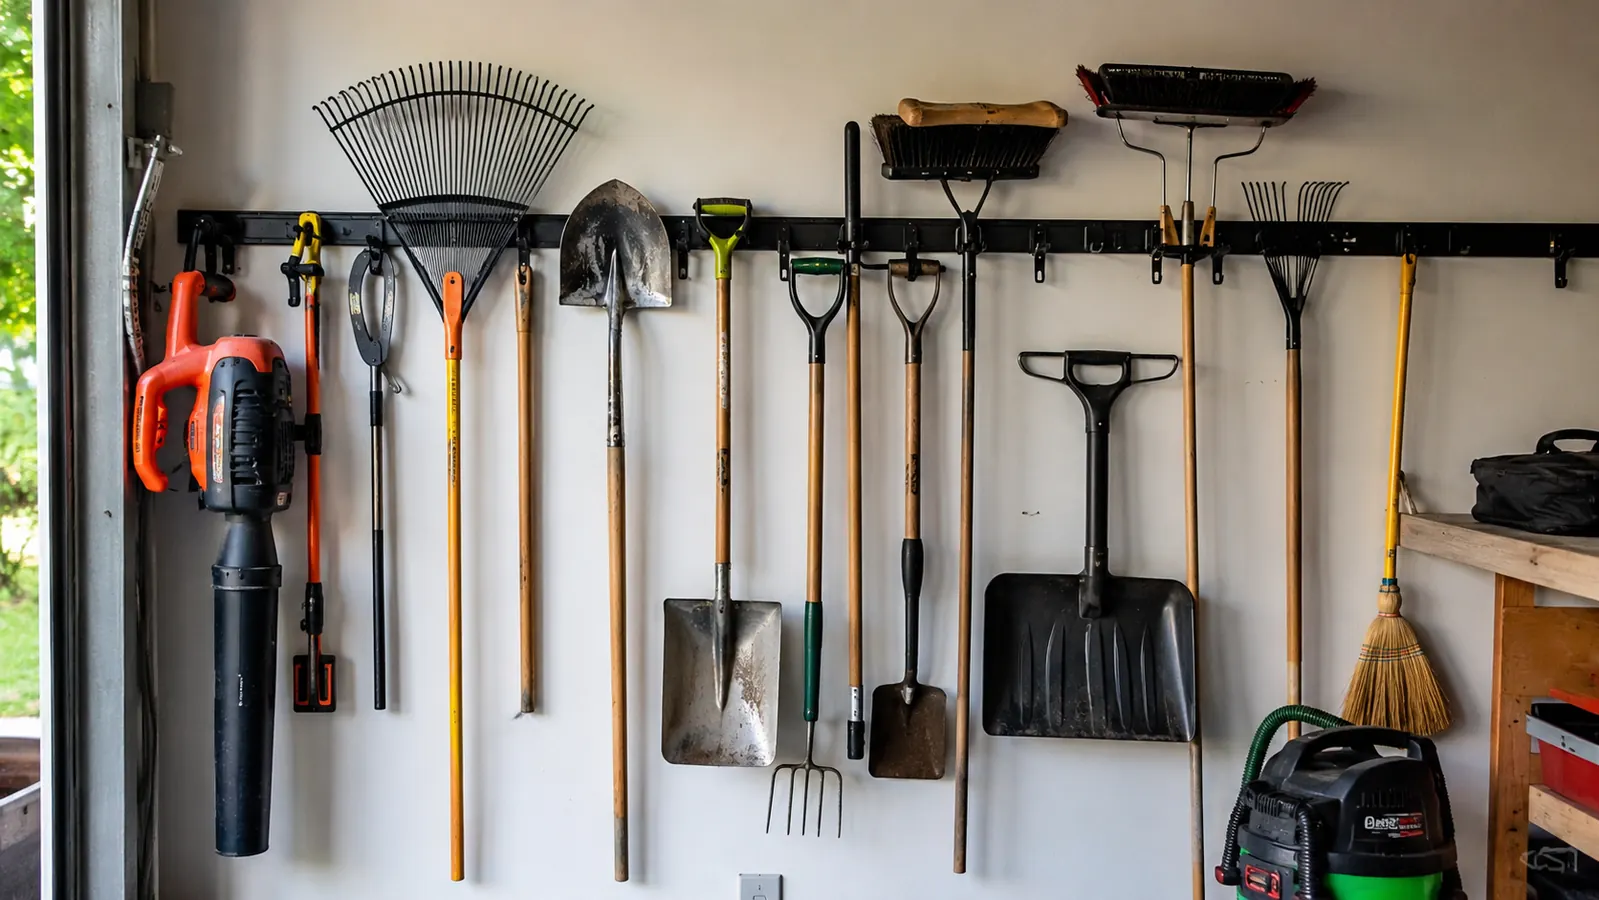
Skip the falling-tool problem for good: this 72-inch rack holds 15 hooks and mounts into real studs
The StoreYourBoard 72-inch Garage Tool Organizer is rated 4.8 stars across 5,700-plus reviews. It ships with 15 repositionable hooks for shovels, rakes, brooms, and sports gear. Check current price on Amazon before you head to the hardware store.
Amazon Check Today's Price on Amazon →Step 1: Find Your Studs and Map the Wall
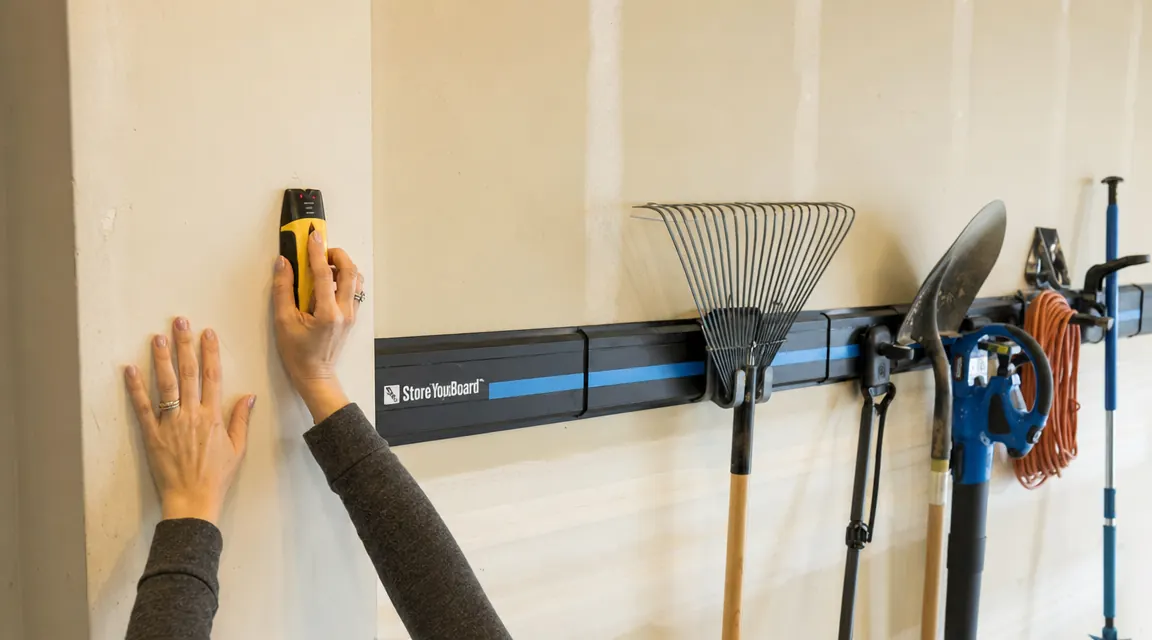
Before you pick up a drill, spend ten minutes mapping the wall. In a standard American garage, studs are 16 inches on center. That means from the center of one stud to the center of the next is exactly 16 inches. Some older garages run 24 inches on center, and a handful of newer builds use metal framing instead of wood. You need to know which you have before anything goes into the wall.
Use an electronic stud finder rather than the old knock-and-listen method. Slide the finder slowly across the wall surface and mark both edges of each stud with a pencil. The center of the stud sits halfway between those two edge marks. On a 72-inch bar, you will want to hit at least three studs, ideally four, which means you need a stud somewhere around every 18 to 24 inches along the run. If your studs fall at 16 inches on center, you will clear four of them easily. If they fall at 24 inches, you will get three, which is still solid as long as your screws are the right size.
Mark every stud center with a small pencil X. Then hold the StoreYourBoard bar up against the wall at roughly the height you want it (more on height in Step 2) and check whether the mounting holes on the bar land near your stud marks. The bar has slots drilled every few inches, so there is flexibility. Confirm at least three stud locations line up with mounting slot positions before you commit to a height.
Step 2: Choose Mounting Height and Mark Your Drill Points
Height is the detail most people skip over. They hang the bar at whatever looks comfortable and then realize a month later that the rake handles are dragging on the floor or the mop is too tall to hang at all. The right height depends on your longest tools. Measure your tallest tool from the hanging point to the floor. Most full-size rakes and long-handle shovels measure 60 to 66 inches from hook to tip. You want the bar high enough that the tool tip clears the floor by at least 2 inches, which puts the center of the bar at around 62 to 68 inches from the floor for most garages.
Once you pick a height, use a 4-foot level to draw a faint horizontal pencil line across the wall at that height. This is your guide line. The bottom edge of the StoreYourBoard bar should sit on this line. Now transfer your stud center marks up to this guide line so you know exactly where to drill. Circle each drill point. Double-check with the stud finder one more time: it is very easy to be half an inch off, and half an inch on drywall is the difference between hitting solid lumber and hitting air.
If your garage wall is concrete block or poured concrete instead of drywall over studs, you will skip the stud-finding step and instead use concrete anchors rated for at least 200 pounds per anchor. The process otherwise is the same: mark your hole positions on a level line, then drill with a hammer drill and a masonry bit.
Step 3: Drill Pilot Holes and Drive the Lag Screws
The StoreYourBoard bar is heavy-duty steel, and the hooks hold real weight, so do not undersize your fasteners. Use 3-inch number-10 wood screws or, better, 3-inch lag screws with a 5/16-inch diameter. Lag screws require a pilot hole so you do not split the stud. For a 5/16-inch lag, drill a 3/16-inch pilot hole first. Go in at least 2.5 inches past the drywall surface so the threads are biting into solid stud wood, not just the drywall layer.
Hold the bar up against the wall and start with the two outermost mounting points. Drive one lag screw finger-tight but not fully seated, then use a level to confirm the bar is still reading level before you seat it fully. A bar that looks level on the guide line but tilts slightly because the line itself was off will drive you crazy for years. Get the bubble centered, then drive the second outer lag fully. After both outer screws are seated, do the center screws. You should feel the drill slow noticeably when the screw threads hit solid lumber. If it spins freely without resistance, you are probably in drywall, not a stud. Back it out, recheck your stud marks, and try again.
Do a tug test before you add any hooks: grab the bar with both hands and pull toward you firmly. A properly mounted bar will not flex, rattle, or shift. If you feel any movement, add a screw at the problem point. The StoreYourBoard bar has extra mounting holes for exactly this reason. Once the bar is solid, give it a hard side-to-side shake. No movement means you are ready to hang tools.
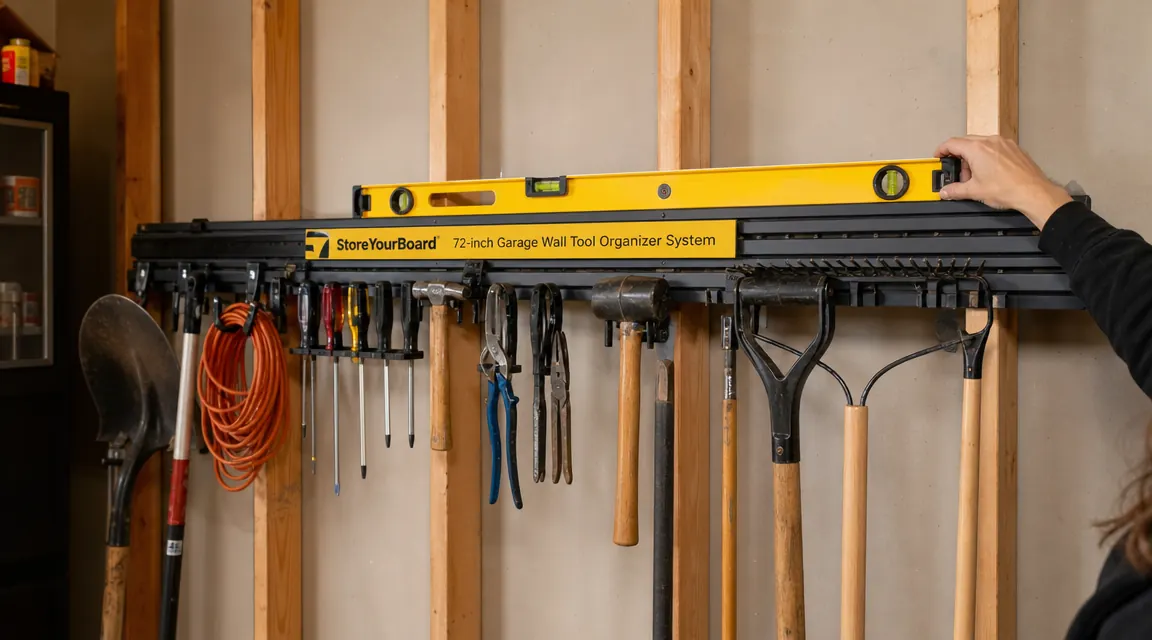
Step 4: Plan Your Hook Layout Before You Load Anything
The StoreYourBoard system ships with 15 hooks in two sizes. The large J-hooks (roughly 6 inches deep) are for long-handled tools like rakes, shovels, hoes, and push brooms. The smaller flat hooks work for lighter items like a leaf blower hose, extension cords, or sports bags. Before you hang a single thing, lay all 15 hooks out on the floor and group them by type. Then think about how you use the garage.
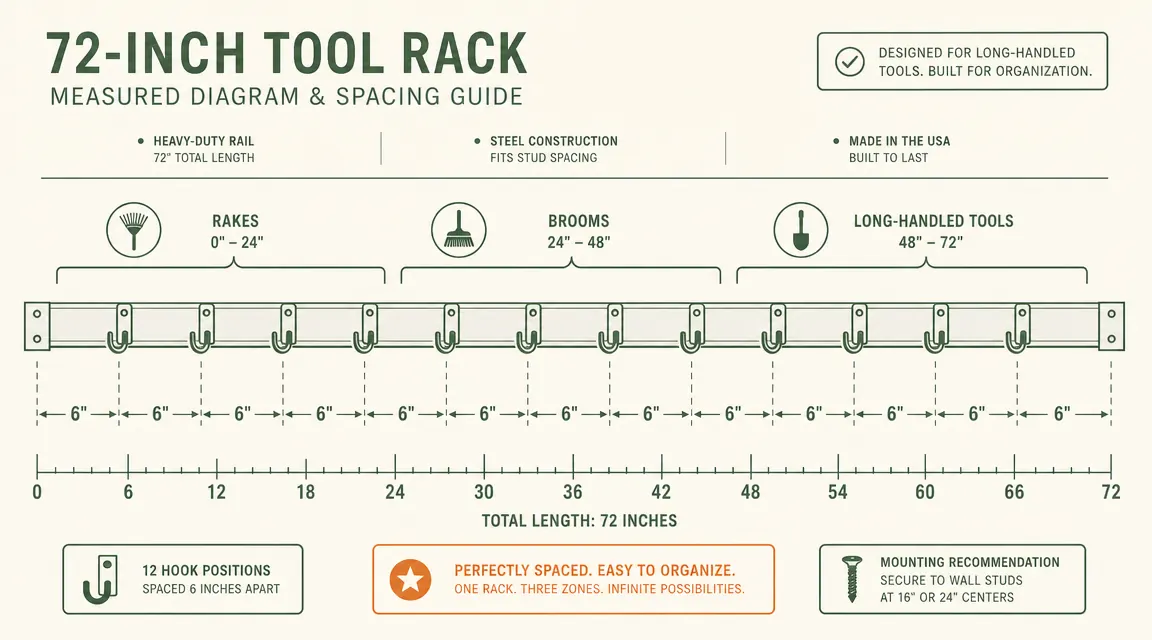
I organize by frequency. The tools I grab every week go in the center of the bar at the easiest reach. Seasonal stuff I only touch twice a year goes toward the outer ends. On our 72-inch bar, that works out to three zones: a 24-inch center zone for the everyday items, and two 24-inch outer zones for seasonal and misc. Keep at least 4 inches between hook centers so that tool handles do not overlap and tangle when you slide one out.
Write your intended layout on a piece of paper before you slide hooks onto the bar. The hooks are repositionable but not effortless to move once tools are loaded. Planning first saves you from rearranging a full, heavy bar. One more note: the StoreYourBoard bar has a weight limit of 50 pounds total per linear foot, which on a 6-foot bar means 300 pounds theoretical maximum. In practice, you will never approach that with normal yard and garden tools. But it does mean you can put a 50-pound bag of fertilizer on a flat shelf hook near the end without worrying.
Step 5: Load Tools Correctly So the Bar Stays Level Long-Term
How you load a wall rack matters as much as how you mount it. Uneven loading puts lateral torque on the mounting screws over time, and a bar that tips even half a degree will gradually creep further. Load the heavier tools toward the center of the bar, over the middle mounting screws, rather than at the outer ends. A 12-pound steel spade hanging from the far right hook exerts much more pull on the outer right screw than the same spade hanging in the center.
Always hang tools handle-down with the business end pointing up. This sounds obvious until you watch someone hang a rake tines-up and then reach past it while reaching for something else. Handle-down also means the heaviest part of the tool, the metal head, sits at the bottom where gravity holds it in place rather than levering the handle off the hook. For the large J-hooks, slip the handle through the hook opening and let it rest in the curve. No straps or bungees needed.
After your first full load, stand back and look at the bar from the side. It should still read level. Check it again with a torpedo level if you want to be certain. If one end has dipped even slightly, loosen the screw at that end just enough to let the bar sit flat, then re-tighten. This is easier to fix now than six months from now when it has settled further. Once everything is straight and tight, walk away. That garage wall is done.
What Else Helps
The wall rack handles long-handled tools well, but it does not address everything in a typical garage. Smaller hand tools like pruners, trowels, and wire brushes need a different solution. A pegboard panel above or beside the rack is the most common pairing and works well as long as you use metal pegboard hooks, not the cheap plastic ones that pop out. For sports equipment with odd shapes, bungee-cord J-hooks work for basketballs and footballs. Bins and shelving units on an adjacent wall handle chemicals, cords, and small containers that would slip off any hook system. The rack takes care of the long stuff, and everything else sorts out from there. Once the floor is actually clear, most garages feel twice as large as they did before, which is not a coincidence. The tools were just taking up that space all along.
Once the floor is actually clear, most garages feel twice as large as they did before. The tools were just taking up that space all along.
The StoreYourBoard 72-inch rack is rated for this exact job, and setup takes about an hour with a drill and a level
More than 5,700 buyers have mounted this rack and kept their garage walls clear. It ships with 15 repositionable hooks in two sizes and works on standard wood-stud garage walls. See current pricing on Amazon before your weekend project.
Amazon Check Today's Price on Amazon →